Pretty Paper Flower Wreath
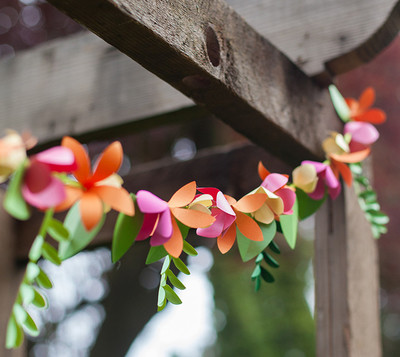
Welcome spring with the Pretty Paper Flower Wreath. This gorgeous DIY spring wreath will be a beautiful addition to your front door or your interior decor. Learn how to make paper flowers with this clever tutorial and attach them to your wreath for a festive look. When you use paper to make your wreath, the flowers never wilt! Your guests will be charmed when they see this lovely wreath on display, and they will be amazed to learn you made it yourself.

Materials:
- Core’dinations ColorCore Cardstock (one sheet of each below) :
- Core Impressions Jenni Bowlin: Vanilla Cr. Aunt Grace
- Vintage Angel Orchid
- Core Essentials Royal Orchid
- Core Essentials Sunrise Orchid
- Core Couture Stiletto
- Core Essentials Tangerine
- Gemstones Quartz
- Sand It Gadget
- Dust Buddy cloth
- Embossing Folder -Dot Background
- Styrofoam Wreath (1 7/8” x 17/8” x 11 7/8” – but any size will work you will just vary the number of flowers you add)
- Ribbon (wide:1 3/4” – 2”)
- Hot Glue Gun
- Foam Dots
- Cricut Machine & Mother’s Day Bouquet Cartridge (or anyone cartridge with flowers)
- 2” Circle Punch
- A Variety of Flower Punches
- Wooden Skewer or Paper Quilling Tool (*optional)
Instructions:
1. Cover Styrofoam wreath with wide ribbon (color of your choice). Fasten ribbon in place securely.
2. Using the Cricut machine & Mother’s Day Bouquet cartridge cut flowers as follows: (*you can use flower shaped punches if you don’t own a Cricut)
a. From Sunrise Orchid cut <Flower3> @ 3” (4 times)
b. From Royal Orchid cut <Flower50> @ 2” (approx. 25 times)
c. From Angel Orchid cut <Flower50> @ 2” (approx. 22 times)
d. From Stiletto cut <Flower23> @ 2 ¾ ” (4 times)
e. From Tangerine cut <Flower15> @ 2 ½ ” (4 times)
f. From Tangerine cut <Flower50> @ 2” (approx.11 times)
g. From Quartz cut <Flower15> @ 1 ¾ ” (4 times)
h. From Quartz cut <Flower50> @ 2” (approx. 13 times)
i. From Vanilla Cream Aunt Grace cut <Flower 19> 2 ½ ” (8 times)
* Remember: you can use whatever colors and flower designs you desire. You could also use a 2” circle punch instead of the Cricut.*
3. Emboss the Sunrise Orchid and Tangerine die-cut flowers. Sand the embossed images and clean off dust with the Dust Buddy.
4. To make the spiral roses:
a. Take one of the 2” circles (Royal Orchid, Angel Orchid, Tangerine and Quartz) and a pair of scissors. Starting at the outside edge of the circle begin cutting into the circle forming a spiral shape as you cut. As you get closer to the center make sure to stop leaving a circle shape, as this will be the base you glue the spiral shape onto.
b. Take a small skewer , quilling tool, or just use your fingers and begin rolling the paper (from the outside edge inward). Keep the spiral shape fairly snug as
you roll towards the center. When you reach the center release the spiral shape and it will relax into shape.
c. Use a hot glue gun, add some glue onto the center part of the flower and then adhere the spiral shape right onto that. Hold until set.
d. Sand the edges of the Royal Orchid and Tangerine spiral roses lightly to give a distressed look.
5. Begin to adhere the flowers to the wreath by assembling the larger flowers together first.
a. Adhere the Stiletto flower to the Sunrise Orchid embossed flower. Then adhere the Royal Orchid spiral rose to the center. (repeat 4 times)
b. Adhere the Quartz flower to the center of Tangerine embossed flower. Adhere the Tangerine spiral rose to the center (repeat 4 times)
c. Adhere a Angel Orchid spiral rose to the center of a Vanilla Cream Aunt Grace flower. Gently bend the petals of the flower. Then adhere to another Vanilla Cream Aunt Grace flower using pop/foam dots.
d. Now you can adhere these larger flowers to the wreath spacing them out accordingly.
e. Then adhere the spiral roses in between making trailing clusters as you adhere them.
The finished Paper Flower Wreath!

Read NextStunning Quilled Paper Jewelry Box
Your Recently Viewed Projects
SissieSass
May 29, 2017
What a colorful way to gussy up a porch or a room in your home that has seemed dreary. I love the color choices, they pair very well together. I think this would make a wonderful gift for someone who had a baby or maybe a couple that just got married. It would be nice to have something of their own to welcome guests that come to wish them well.
Report Inappropriate Comment
Are you sure you would like to report this comment? It will be flagged for our moderators to take action.
Thank you for taking the time to improve the content on our site.

