Galaxy Stars DIY Sympathy Card
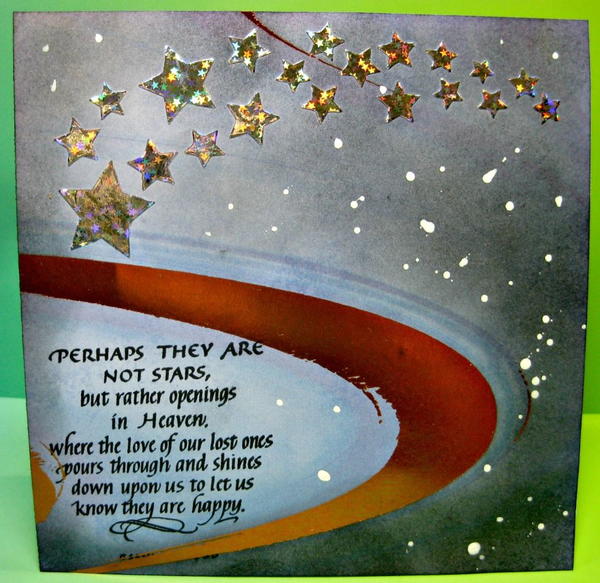
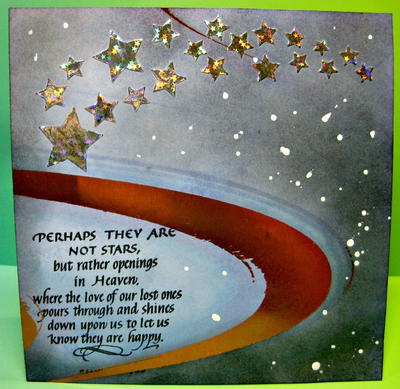
Bring the beauty of the night sky to your loved ones with this stunning DIY sympathy card inspired by the evening stars. Made using foil transfers, you can design a field of shining silver stars with this tutorial for how to make a sympathy card. If a friend or family member has recently lost a loved one, this celestial condolence message is the perfect way to show them how much you care.
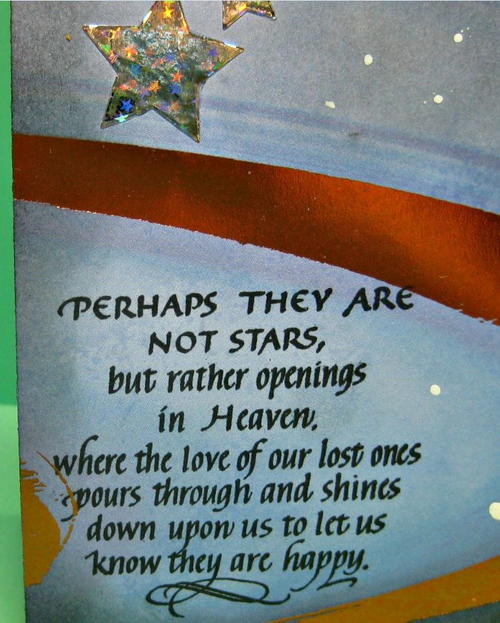
From the Designer: "Sympathy cards are hard to make sometimes, but something we all need. Today I am sharing an easy way to create a star filled galaxy sympathy card with a beautiful thought from an Eskimo legend: 'Perhaps they are not stars, but rather openings in heaven where the love of our lost ones pours through and shines down upon us to let us know they are happy'.”
Estimated Cost$21-$30
Time to CompleteIn an evening
Primary TechniqueMixed Media
Project or Page SizeCard
Type of Paper UsedCardstock

Project TypeMake a Project
Materials List
- “Perhaps They Are Not Stars” stamp by Quietfire Designs
- Butterflies and Stars Stencil by Suzanne Cannon for Quietfire Designs
- Deco Foil Transfer Gel by Therm O Web
- Silver Star Deco Foil by Therm O Web
- Stencil knife
- Laminator (I used a Royal Sovereign.)
- “Break of Dawn” patterned paper by The Paper Studio
- Tim Holtz Black Soot Distress Ink by Ranger, black and yellow dye inks
- Sponges
- White Acrylic Paint
- Sympathy Word Block Die by Impression Obsession
- Nuvo Deluxe Adhesive Glue
Instructions:
-
Cut a piece of foiled galaxy looking patterned cardstock 5 ½ inches by 5 ½ inches.
-
Tape a stars stencil over the piece with temporary tape. Apply Deco Foil Transfer Gel through the star stencil with a stencil knife. Remove the stencil, clean it with soap and water and let the transfer gel dry until it is clear.
-
Place a piece of Silver Star Deco Foil over the stenciled stars in a folded piece of parchment paper and run through a pre-heated laminator.
-
Stamp the beautiful “Perhaps They Are Not Stars” sentiment with black ink inside the galaxy swirl.
-
Sponge Ranger Black Soot Distress Ink over the entire card except where stamped and stenciled.
-
Mix white acrylic paint with water on a craft sheet and spatter on the card for more stars and the “galaxy” look.
-
Attach the completed card front to a 5 ½” square white cardbase.
-
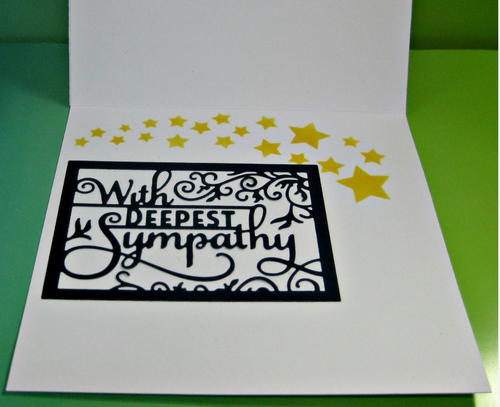
Sponge yellow dye ink through the Quietfire Designs stars stencil in the inside of the card.
-
Die cut and attach the Sympathy Word Block to the inside of the card. I use Nuvo Deluxe Adhesive with the fine tip to attach all detailed diecuts to my cards. The glue is easy to apply only where wanted, dries clear and holds beautifully.
For more paper crafts like this, please visit my blog, Karen's Kreative Kards.
Your Recently Viewed Projects
Report Inappropriate Comment
Are you sure you would like to report this comment? It will be flagged for our moderators to take action.
Thank you for taking the time to improve the content on our site.

