Sprawling Vine Scrapbook Layout
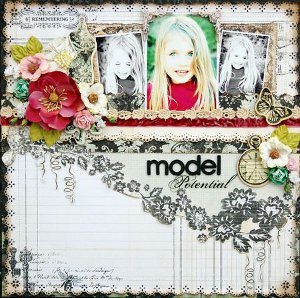
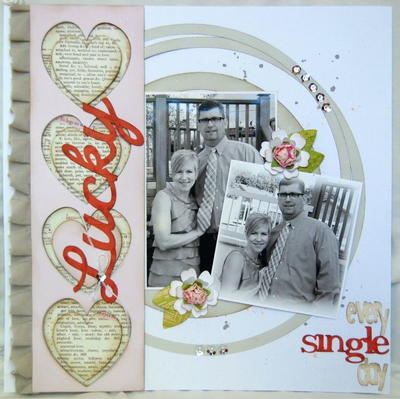
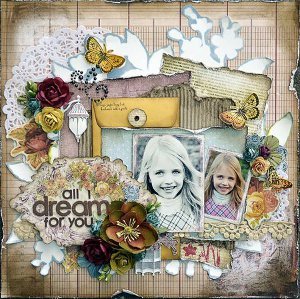
Learn how to scrapbook a layout that focuses on innovative design layouts. The Sprawling Vine Scrapbook Layout draws the eye around the page in the unique way the elements have been laid out. Prima flowers, lace, ribbon, chipboard and more create a detailed design that is beautiful and captivating. The sentiment is perfect for scrapbooking about a daughter or niece. Use the tips offered in this tutorial and apply them to scrapbook page layout ideas for years to come.

Materials from Prima:
- 843540 - Printery Collection - Love Ledger
- 843526 - Printery Collection - Page Four
- 843557 - Printery Collection - Folio
- 843519 - Printery Collection - Signature
- 551247 - Printery Chipboard Pieces
- 890742 - Shabby Chic Resin Treasures
- 544225 - Alphabet Chipboard - Black
- 543761 - Orchard Mix - Dewdrop
- 538637 - Fairytale Roses
- 539504 - Primrosa
- 538675 - Cameo Roses
- 540456 - Mulberry Rose Leaves
- 545482 - Alencon Lace
- Prima Velvet Ribbon
- Special Edition Gypsophillia, Small Roses and White natural flowers
Other Materials:
- Martha Stewart Around the Page Punch
- Tim Holts Distress Ink - Walnut Stain
- Ranger Glossy Accents
- Distress Ink Tool
- Tattered Angels Chalkboard Glimmermist - Cotton Candy
Instructions:
1. Carefully cut around the patterned paper and trim it back as shown on the LH side, so that it can sit above other elements on your page. The new Prima Craft Knife is perfect for this step.

2. Use the Martha Stewart around the page punch to create a decorative edge around your page. Ink edges and stick down onto the black paper.
3. From the paper that has several distinct areas on it, cut out the long black damask floral part. Punch across the top edge. Ink edges.
4. Cut a strip from the cream left over part of the paper the first cut out came from and punch across one side. Ink edges and stick down as shown below.
5. Add the two layers of ribbon as shown.

6. Arrange the hand-cut edge and the strip across the page and stick down.
7. Cut another section from the patterned paper, the bordered ledger part. Ink edges and stick down just above the top of the punched edge.

8. Glimmermist 2 small roses and one of the white flowers to the delicate pink colour.
9. Add your photos, chipboard, floral embellishments, and, finally, your title to finish off the page. I have printed part of the title onto a transparency, cut around it and stuck down with Ranger Glossy Accents. I used Porcelain font downloaded from the internet.

By placing the emphasis on the large deep pink flower, deep pink velvet ribbon and the deep pink in the colour photograph, a trio of accents has been created to make the whole page pop.

Sizing of flowers is crucial in making a floral cluster work effectively. Always start with your largest flower/s and work downward in size from there, adding small sprays and leaves as the last touch as this is the best way to ensure balance in both design and color composition to the cluster.

The small cluster provides balance to the larger cluster and also helps in creating part of a visual triangle in the design of the LO.

This beautiful project is only one of many found in our collection, Free Printable Crafts: 50 Handmade Card Ideas, Scrapbook Layout Ideas, and More Paper Crafts.
Read NextLucky in Love Scrapbook Layout
Your Recently Viewed Projects
Daughter of Light
Aug 31, 2018
Details! Details! Details! Wow! I love it in this Sprawling Vine Scrapbook Layout! The vintage look created by the two black and white photos the trim of the edge and inking of the background paper is amazing. The application of the ribbon and lace is exquisite. I'm grateful for the tip in arranging a floral cluster. I've been wanting to add that to my pages but find myself timid. Now I'll have a go at it. Sooooo much inspiration in one place! Thanks!!!
Report Inappropriate Comment
Are you sure you would like to report this comment? It will be flagged for our moderators to take action.
Thank you for taking the time to improve the content on our site.

