Once Upon a Time Paper Doll
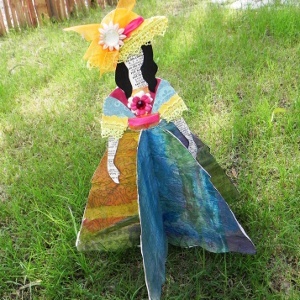
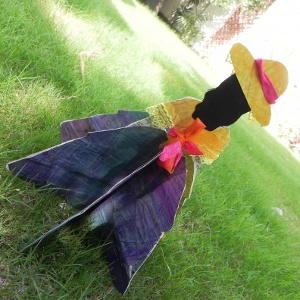
Learn how to make a paper doll with recycled materials! The Once Upon a Time Paper Doll is both beautiful and eco-friendly. Use a variety of upcycled materials such as fabric scraps, old cards, newspaper, ribbon, and more!
With the help of Mixed Media Doll Stencils from Altered Upcycling, you can completely customize your beautiful paper doll. This doll would make a gorgeous display for a girl's room. Instead of purchasing a new doll at the store, make one of these beautiful upcycled dolls instead.
Estimated CostUnder $10
Time to CompleteIn an evening
Primary TechniqueMixed Media

Materials List
- Altered Upcycling Mixed Media Doll Stencils
- Paper scraps
- Ribbon
- Glue
- Leftover embellishments
Instructions:
-
Start with gluing down a couple of sheets of dictionary or book paper onto card. I usually save cereal boxes etc. for this step. For this particular doll, since both her front and back will be showing, I glued dictionary paper to both sides of the cereal box.
-
Take out your stencils and trace out the doll head, torso and straight arms onto the dictionary paper/ cereal box card. Cut these out.
-
Join the head to the torso and glue on the arms. Now choose a hairstyle you like and trace that onto some black or brown card. Cut it out.
-
I made this doll using the Victorian ball gown. Trace out the pieces for the bodice and cut them out using different pieces of scrapbooking paper. You need very small pieces so I usually dig into my scraps for this step.
-
Now lay your doll down and arrange all the pieces of the dress bodice on the torso. The stencils works as a guide to let you know which piece fits in where. Glue all the pieces down onto the body.
-
Glue the hairstyle down too.
-
Now turn the doll over and trace out the back of the dress using the doll front as a guide. Cut this out as one piece as shown in the picture below. Do the same with the hairstyle back. I traced the doll front and just added the length I wanted and rounded it out from the bottom. Glue the dress back and the hair back to the doll.
-
Lay the doll down on a piece of paper and draw a free form skirt, making sure the top fits with the bodice. You can use the dress skirt given in the stencils as a guide but since the skirt is your book page you can make it fuller or thinner according to what you want. Just make sure the dress skirt is symmetrical.
-
Cut out 6 identical skirts.
-
This part is a little tricky. Take 3 dress skirts and fold them in half. Now glue them together as shown in the pictures. That is, one half of the skirt will be glued to the half of the next skirt, forming a little book. at this point we will make 2 separate little books using three skirts for each.
-
Now you should have two little books. Choose which book is going to be at the front and which is going to be at the back. Take the back book and glue down the doll torso, making sure the dress bodice sits on top of the dress skirt. The doll back will face book part.
-
Take the book that will sit in the front and glue it down to the doll and the rest of the dress skirt. The instructions sound a little difficult but once you have all the pieces this will make sense. Your doll should look like the doll in the pictures now!
-
The last step is the best! Use whatever you have lying around in your little scrap box to decorate your doll. Add a sash, some headgear using your stencils, some embellishments and flowers.
-
Your paper doll book is ready! Fill it with stories and memories. If you need any help at all with these instructions please email me at thecraftycan(at)gmail(dot)com.
Read NextStellar Sister Printable Paper Dolls
Your Recently Viewed Projects
Report Inappropriate Comment
Are you sure you would like to report this comment? It will be flagged for our moderators to take action.
Thank you for taking the time to improve the content on our site.

