Mixed Media Clay Canvas
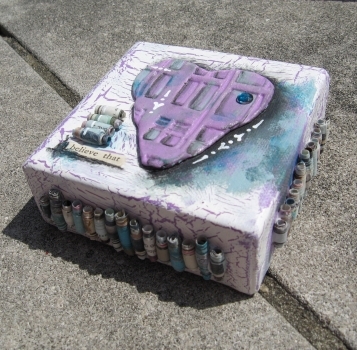
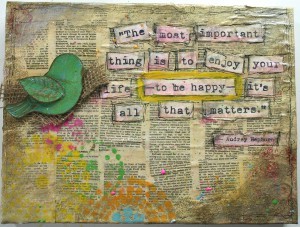
Make a gorgeous wall decoration for your home or office with the Mixed Media Clay Canvas. Use various mixed media art techniques in order to create this beautiful canvas. You can make just one, or you can make several clay crafts to hang on your wall. The canvases look better when you hang them up in groups. Recycle old magazines in a unique way and learn great techniques for crafting with polymer clays. The results are absolutely marvelous.

Materials:
- 1 block of Premo! Accents: Purple Pearl - 2 oz
- Sculpey Acrylic Roller
- Sculpey® Clay Mat
- Sculpey® Etch ‘N Pearl
- Sculpey® Super Slicer
- Water, Baby Wipes, Paint Brush, and Scissors
- Unmounted Polymer or Rubber Stamps (or Sculpey Texture Makers)
- Pages from a catalog, and pages of text
- Tile or Clay Dedicated Baking Sheet
- Acrylic Paint (Artists Tube or Crafters Bottle)
- Crackle Medium FolkArt by Plaid
- Gel Medium
- Black Stabilo Glaziers Pencil
- White Signo Uniball Gel Pen (Broad)
- Rhinestones
Instructions:
Do not use unbaked clay on unprotected furniture or finished surfaces. Start with clean hands and work surface area. Good work surfaces include wax paper, metal baking sheet, or disposable foil. Knead clay until soft and smooth. For best results, clean your hands in between colors. Shape clay, pressing pieces together firmly. Bake on oven-proof glass or metal surface at 275°F (130°C) for 30 minutes per ¼" (6 mm) thickness. For best baking results, use an oven thermometer. DO NOT USE MICROWAVE OVEN. DO NOT EXCEED THE ABOVE TEMPERATURE OR RECOMMENDED BAKING TIME. Wash hands after use. Baking should be completed by an adult.
Begin by preheating oven to 275°F (130 °C). Test temperature with oven thermometer for perfectly cured clay. For best results, condition all clay by running it through the clay dedicated pasta machine several passes on the widest setting. Fold the clay in half after each pass and insert the fold side into the rollers first.

1. Use a single solid color of clay, or blend multiple colors by kneading them together until your desired color is obtained. Roll out a flat pancake of clay about an 1/8 of an inch thick.

2. Use the corner of your Super Slicer to cut out a heart shape, using caution not to cut through the mat.

3. Dampen your stamp or Texture Maker with water, and press them into your clay firmly. (The water will act as your release agent.) You want at least 1/16 inch deep impression. Peel back only a corner of the stamp to see if you have a good impression and lay it back down keeping the stamp in the exact same position. Peel the opposite corner now, and check your impression. Press firmly on areas that need deeper impressions. Lift and remove your stamp.

4. Place your stamped hearts on the pan, with a bit of room around each so they are not touching.

5. Bake according to the directions above and allow to cool thoroughly.

6. Find colorful catalog pages and cut them into long triangular strips. These will make your accent beads, so you may want to find pages that color coordinate with your project.
7. Using the Sculpey Etch ‘N Pearl Tool, take a strip of the paper and gently begin wrapping the wide end of the paper around the widest part of the tool. After you've wrapped once or twice around, smear a thin line of gel medium down the inside (the side facing up) of the paper. Continue wrapping, and all the gel medium will be covered by the next rotation of the paper. When you get to the end of the paper you will have a fat little bead. Slip the bead off the narrow end of the tool and let it dry.
8. Paint your canvas with the base color of acrylic paint. Let the paint dry completely.
9. Paint one generous coat of acrylic crackle medium over the basecoat. Generally speaking, the thicker the coat of crackle medium, the larger the cracks in your final piece. Thinner coats result in more subtle cracks. Let this dry thoroughly. It will have a very shiny appearance even when dry.
10. Cover your canvas with a coat of the acrylic paint you want to be the top color. When painting this coat, it is important your paint should be a bit fluid and move nicely across the canvas with sweeping and gentle ONE stroke coverage. You do NOT want to have to scrub the paint brush back and forth for coverage in this step. The scrubbing motion will break down the crackle medium and it will not crack later on. Let this dry completely. As the paint begins to dry the cracks will appear.
11. Using gel medium as your adhesive, glue some of your paper beads on all 4 sides of your canvas. I paint a lumpy line down the middle of the canvas and sort of embed the beads into it. Clean up any excess gel medium with a clean paintbrush. Let dry. You can do this in 4 stages if you like, but if you are careful, usually you can do it all at once. Wash your paint brush immediately, before the gel has a chance to harden.
12. Find interesting phrases in your pages of text, and cut them out.
13. Choose one heart and one phrase that seem like a pleasing fit for your canvas. It is amazing how each heart can have its own quirks and personality, and certain phrases will work better than others. Temporarily place the heart and phrase on the canvas where you like them. Using the Stabilo Glaziers pencil trace one side of the heart and 2 sides of the phrase. This will give you placement guidelines for the next step.
14. Lay the heart and phrase to the side. Using your first color, lay a bit of paint down to the outside of your Stabilo lines. (Stabilos are water soluble, so don’t panic if it dissolves a bit with the paint.) Try for a shade or so darker than the base coat, but in the same color family. Make your strokes free and loose, you don’t want a tight and controlled coverage. Now paint your heart with a coat of the paint and let dry for a minute or two. With a baby wipe, wipe off the high parts of the heart, leaving traces of paint in all the textured and impressed areas. Let the paint completely dry on the canvas and the heart.
15. Repeat Step 14 with a second color of acrylic paint. Let dry completely.
16. Go back with the Stabilo pencil and darken the outlines you drew in Step 13. Smudge gently with your finger to soften and spread, creating a thicker line. You may also use a brush dampened with water to blend and soften. This step is creating a bit of a soft drop shadow for your heart.
17. Using gel medium, adhere the heart and phrase to the canvas. Adhere beads above the phrase if you like. Let dry.
18. Use the Signo Uniball White Gel Pen to draw accents on your clay piece, in the shadow area of paint, and and on a few of the beads. Finish off your art with a bit of bling, by securing a rhinestone with a dot of gel medium.

