Clay Magnolia Journal Cover
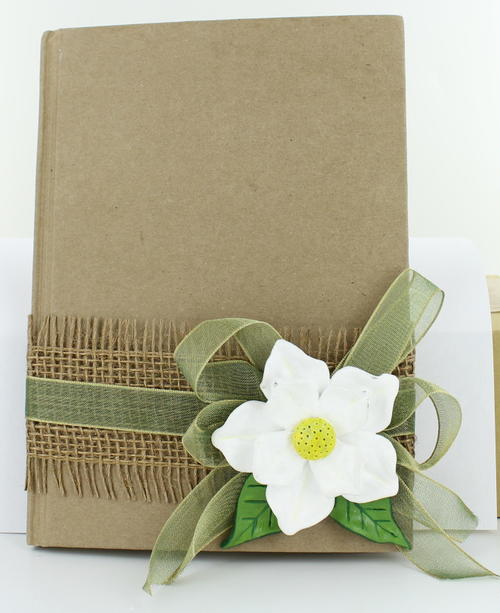
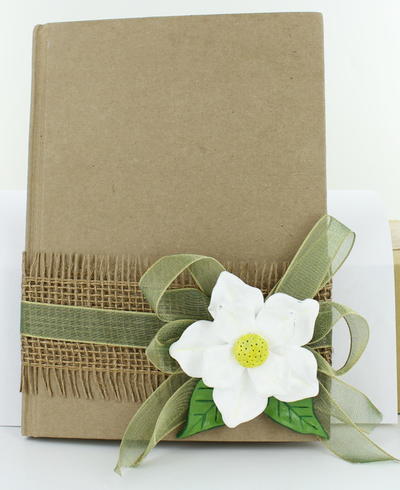
Flowers are so pretty, it's a real shame they're only in season for a limited time. With this Clay Magnolia Journal Cover, you can keep a flower by your side all year long. This pretty clay flower works well on the cover of your DIY notebook or journal, and it's especially perfect for a garden journal or pressed flower book. You'll love how easy it is to make, too. All it takes is a little clay and some paint and you suddenly have a gorgeous floral applique that won't wilt when it gets too cold.
Estimated Cost$11-$20
Time to CompleteIn an evening
MaterialsClay
Primary TechniqueGeneral Crafts

Project TypeMake a Project
Materials List
- 1 bar Original Sculpey clay
- Sculpey Acrylic Roller, 8"
- Acrylic paints: white, yellow, leaf green, hunter green, gold
- Paintbrush
- Craft knife
- Medium sized leaf cutter
- Burlap ribbon
- Toothpick
- Glue
- Journal
NOTE: Clay may damage unprotected furniture or finished surfaces. Do not use polymer clay on unprotected surfaces. Good work surfaces include the Sculpey clay mat, wax paper, metal baking sheet, or disposable foil.
-
Start with clean hands and work surface area. Knead clay until soft and smooth. For best results, clean your hands in between colors. Shape clay, pressing pieces together firmly. Bake on oven-proof glass or metal surface at 275°F (130 °C) for 15 minutes per ¼" (6 mm) thickness. For best baking results, use an oven thermometer. DO NOT USE MICROWAVE OVEN. DO NOT EXCEED THE ABOVE TEMPERATURE OR RECOMMENDED BAKING TIME. Wash hands after use. Baking should be completed by an adult.
Begin by preheating oven to 275 °F (130 °C). Test temperature with oven thermometer for perfectly cured clay. For best results, condition all clay by running it through the Clay Conditioning Machine for several passes on the widest setting. Fold the clay in half after each pass and insert the fold side into the rollers first.
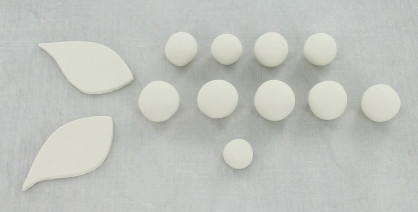
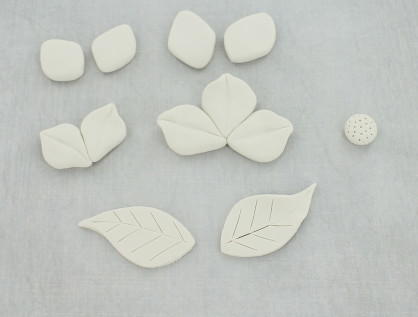
Condition ½ package of Sculpey Original Clay. Make five ¼” thick balls. Shape the five balls into petal shapes, almost like a rounded diamond shape. Using the end of your paintbrush make a crease in the center of each and bend the petals up slightly. Attach the 5 petals together to form a flower shape. -
Make four 1/8” thick balls. Shape the five balls into petal shapes, almost like a rounded diamond shape. Using the end of your paintbrush make a crease in the center of each and bend the petals up slightly. Attach the 5 petals together to form a flower shape.
-
Make one 1/16” thick ball for flower center.
-
Roll out a sheet of clay that is 1/8” thick. Cut out two leaf shapes using the leaf cutter. Using your craft knife make veins in each of your leaves. Bend leaves slightly to give them a lifelike look. Attach these to the bottom of your larger flower.
-
Now attach your smaller flower shape onto the top of the larger flower. Press gently.
-
Press the smaller ball onto the center of the magnolia flower. Texture the center using a toothpick or poking tool.
-
Bake according to above directions. Allow to cool.
-
Start by painting the leaves of your flower with the Leaf Green. Paint the flower petals white and the center yellow. You will most likely need to give these a second coat.
-
With the Hunter green, paint the veins of the leaf and edges. Mix some yellow and white paint to make a pale yellow. Add a light line of paint down the center of each petal. Brush a light coat of gold over the yellow center.
-
Allow paint to dry for a few hours. Then apply a coat of Sculpey Satin glaze.
-
Embellish your journal with burlap ribbon and then glue the magnolia flower to the journal.
Read NextDIY Paper Journal for Kids
Princess Carolyn
Jul 14, 2017
How cute and fun! This is a lovely way to spice up a plain journal.
Report Inappropriate Comment
Are you sure you would like to report this comment? It will be flagged for our moderators to take action.
Thank you for taking the time to improve the content on our site.

