Flowers for Sale Greeting Card
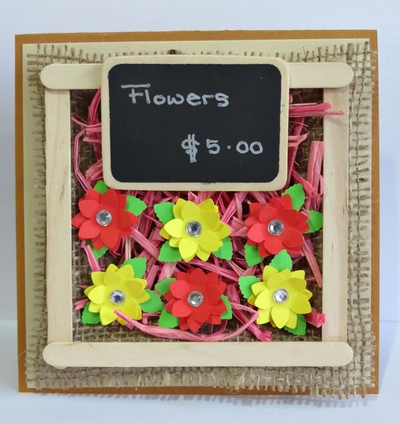
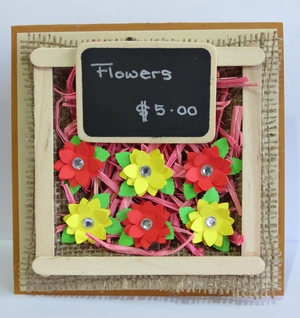
Celebrate visits to a farmer’s market and the fresh produce of the spring with the Flowers for Sale Greeting Card. Homemade card ideas like this one are perfect for celebrating the warmer weather. Use some ice cream sticks to build a mock crate on the front of the card. Fill it with flowers and add a sales message on a small blackboard. The DIY paper flowers are so bright and cheery. You are ready to bring some spring greetings!
Materials:
- 11” x 5.4” Caramel Colored Cardstock
- Two 5.2” Sized Squares Cut from Cream Colored Cardstock
- 5.1” Sized Square Cut from Natural Hessian (Burlap)
- Twelve 4.4” Long Wooden Ice Cream Sticks
- Red, Yellow and Green Cardstock
- Twelve Upikit 6mm Self-Adhesive Diamond Bling Stickers
- Hot Pink Raffia
- 2.5” x 2” Wooden Blackboard
- Large Petal Palm Punch from Xcut, code xcu 261811
- Leaf-Shaped Paper Punch
- Pilot Silver Marker Pen
- Pencil
- Ruler
- Pair of Standard Scissors
- Clear-Drying Craft Glue (such as bostik clear)
Instructions:
1. Score the caramel colored cardstock in half to create a card sized 5.4” x 5.4”.
2. With the fold at the top, glue one of the cream colored squares to the front of the card.
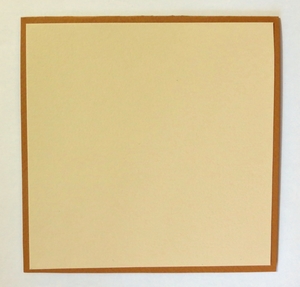
3. Glue the second cream colored square to the inside of the card where a message could be written to the recipient. This will also make the card sturdier.
4. Use the ice cream sticks to build a “crate” on the front of the card:
a. Glue two sticks on the left and right of the card.
b. Overlapping those glued to the left and right, glue two sticks on the top and bottom.
c. Overlapping those glued to the top and bottom, glue two more sticks to the left and right again.
d. Add two more sticks to the top and bottom.
5. Line the “crate” with the Hessian:
a. Glue the Hessian to the inside of the crate.
b. Add glue all around the top of the last layer of ice cream sticks and also glue the Hessian over the sides of the “crate.”
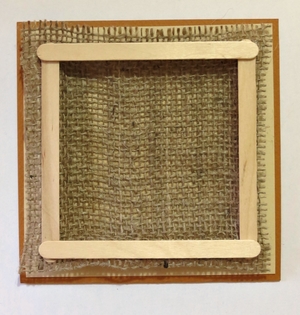
6. Add another row of sticks to the crate.
7. Cut the raffia into smaller pieces and use glue to line the Hessian with the raffia. It will look as if the crate has been filled with straw.
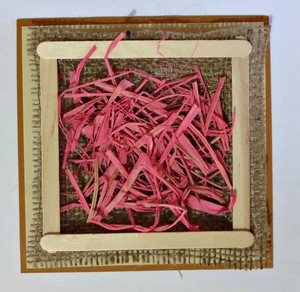
8. Now make the flowers:
a. Punch three flower petals from the red cardstock and three leaves from the green cardstock.
b. Glue the three flowers on top of each other, but do not glue them down completely, so that you can bend the petals of the top two flowers slightly upwards.
c. Glue the three leaves to the back of the three flowers.
d. Add a diamond bling sticker to the centre of the three flowers.
e. Repeat steps a-d until you have three red and three yellow flowers.
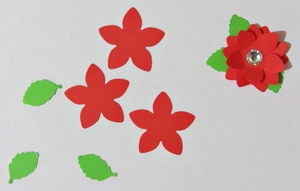
9. Use the silver pen to write a message on the blackboard. In the example, the message on the blackboard reads “Flowers $5.00” Tip: If the blackboard is attached to a clothes peg, gently remove the peg.
10. Glue the blackboard to the inside of the “crate.”
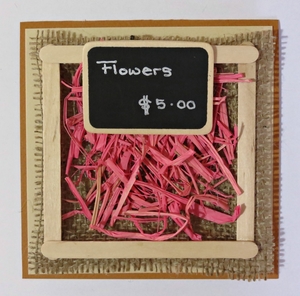
11. Glue the six flowers to the inside of the “crate.”


