Tuxedo Blooms DIY Card
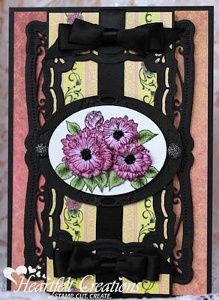
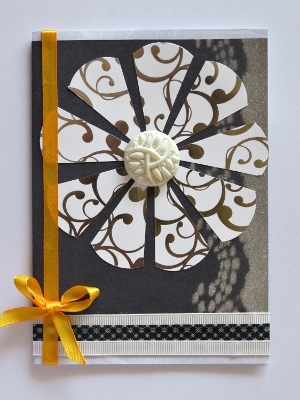
Add a formal flair to your next handmade card. The Tuxedo Blooms DIY Card is a beautiful card making idea that uses radiant colors against a black die cut frame. The contrasting colors lend this card an elegance that can't be beat. This project is ideal for any occasion you can think of. From a wedding congratulations to a happy birthday card and more, you will amaze your loved one when you send them this all-occasions greeting. The central flower motif is the perfect touch to complete the elegant and classy handmade card.

Materials from Heartfelt Creations:
- HCPC 3582 Majestic Morning Bouquet PreCut Set
- HCPC 3578 Majestic Morning Background PreCut Set
- HCD 742 Majestic Blooms Die
- HCDP1 239 Majestic Morning Paper Collection
- 088598 Gold Ovals One
- 354804 Oval Small
- 031461 Radiant Rectangles
- 159223 Paper Blossoms Molding Mat
- 459222 Paper Blossoms Tool Kit
- 11blk Black Gala Glitz
Other Materials:
- Black and White Cardstock
- Memento Tuxedo Black Ink
- Copics G82, 85, 94, RV52, 63, 66
- Spellbinders Resplendent Rectangles
- A-Muse Black Ribbon
- Recollections Glitter Dots
Instructions:
-
Base card in black measures, 6 3/4" x 4 3/4".
-
Cut pattern paper from the beautiful Majestic Morning collection 6 1/2" x 4 1/2" and adhere to base.
-
Die cut frame from Resplendent Rectangles, apply some 3D dots and adhere to card.
-
Cut black CS 6 1/2" x 2 7/8" then cut pattern paper 6 5/16" x 2 13/16", adhere together and apply ribbon.
-
Add some 3D dots and adhere in center of first frame.
-
Die cut second frame from Resplendent Rectangles and adhere.
-
Die cut the largest die from ovals small, use this oval to emboss with the #4 die from Gold Ovals One.
-
Add 3D dots and place in center.
-
Next stamp image on white CS, color, die cut with the #2 die from ovals small, add 3D dots and place over embossed oval.
-
Stamp flowers, cut using the coordinating die, shape and adhere to stamped image.
-
Add some glue in centers and sprinkle some Gala Glitz to make the flowers come alive.
-
Add a glitter dot for added bling.
- To finish it off added 2 bows.
Read NextBright Hello Greeting Cards

