Salt Dough Cookie Card
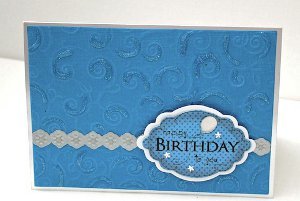
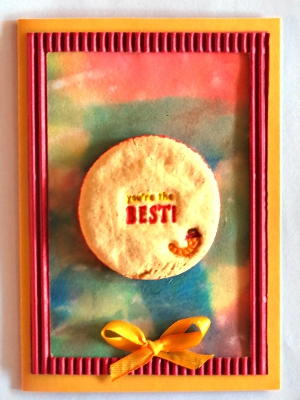
Making salt dough ornaments is something that every person can remember from his or her childhood. Bring these memories into your card making with the Salt Dough Cookie Card. Homemade card ideas like this are made with a wonderful blend of nostalgia and originality. Use a cookie cutter and add some stamped words and images to the clay dough. Make a card that will stir some memories and will make the recipient feel special in every possible way.
Materials for the Background:
- Red, Dark Blue, Green, Yellow and Orange Crepe Paper (choose the type that “bleeds” when it gets wet you might have to experiment before buying more than one color)
- Piece of Watercolor Paper
- Water Spray Bottle
- Old Baking Tray
Materials for the Salt Dough Embellishment:
- ½ Cup of Cake Flour
- ¼ Cup of Cold Water
- 2 Tablespoons of Salt
- Few Drops of Yellow Food Coloring
- Circular Cookie Cutter, Approximately 2” in Diameter
- Suitable Stamp (for this project, micia clear stamp images of a small worm and the phrase “You’re the Best!” were used)
- Clear Acrylic Block
- Yellow; Orange, Red and Brown Colored Felt-Tip Pens
- Old Baking Tray
- Silicone Baking Sheet
- Rolling Pin
Materials for the Card:
- 8.2” x 5.7” Pumpkin Yellow Cardstock
- 5.3” x 3.6” Red Corrugated Cardstock
- Small Yellow Satin Ribbon
- Pencil
- Ruler
- Scissors
- Quick-Drying Craft Glue
- Background and Salt Dough Embellishment
Instructions for Making the Background:
1. Use the spray bottle to wet the watercolor paper.
2. Cut different sizes and shapes from the crepe paper and layer them onto the watercolor paper.

3. Spray the tissue paper to continue to wet it.
4. Lightly touch any air pockets with your finger so that the crepe paper will stick to the watercolor paper.
5. Gently peel away the crepe paper and let the watercolor paper dry. As the paper dries, some interesting patterns will continue to develop on the watercolor paper.

Instructions for Making the Salt Dough Embellishment:
1. Mix the flour, water, salt and food coloring together in a bowl. Tip: The dough should not have a sticky consistency. If it sticks to the cookie cutter rather add a little bit more flour and mix thoroughly again.
2. Place the silicone baking sheet onto the baking tray. Roll the dough out directly on the baking sheet to a thickness of 0.15” and cut out the circle with the cookie cutter.
3. Remove excess dough and stamp image onto the dough circle.
4. Bake at 150º Celsius (300º Fahrenheit) for one hour.
5. Allow to cool before using the colored felt-tip pens to add some detail to the embellishment.

Instructions for Making the Card:
1. Score the pumpkin yellow cardstock in half to create a card sized 5.7 x 4.1”.
2. With the fold at the left, center and glue the piece cut from the background to the front of the card.

3. Take the piece of corrugated cardstock. Cut out the inside, leaving a space of 0.2” from the outer edges of this piece to make a “frame.”
4. “Frame” the background with the red corrugated cardstock.
5. Glue the embellishment and the ribbon in place.


