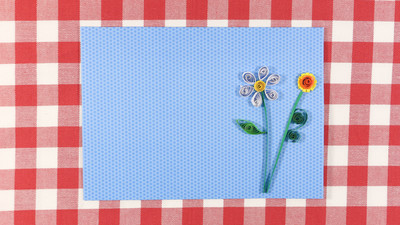
Quilled Flowers Card

Adorn your next homemade card with a precious quilled flower. This beautiful Quilled Flowers card is versatile and sweet. If you are looking for card making ideas for spring, look no further than this cute DIY card. Its flower embellishment is a pretty paper quilling pattern for beginners. So, anyone can make the sweet flower card. Use it as a birthday card, thank you note, or a greeting card. The options are endless for this cute-as-can-be homemade card project.
Estimated CostUnder $10
Time to CompleteUnder an hour
Primary TechniqueQuilling
Project or Page SizeCard

SeasonSpring
Materials List
- Quilling paper in various colors – green, white, yellow, orange
- Quilling tool
- Aleene’s Quick Dry Tacky Glue
- Card base
Instructions:
Create Flower 1:
Roll six white strips to about the same size – not too tight, but smallish in size. Then, glue the ends.
-
Tightly roll one yellow strip and glue the ends.
-
Tightly pinch one end of each white piece.
-
Glue your yellow circle to the card and arrange each of the six white petals around it to create your flower.
-
Roll one green piece and let it rest until it is a bit larger in size. Then, glue the end.
-
Tightly pinch both ends to create a leaf.
-
Glue a short strip of green paper, up on its edge, from the bottom of the flower down to the bottom of the card to create a stem.
-
Glue the leaf next to the stem.
Create Flower 2:
Tightly roll an orange piece and glue the end.
-
Take a shorter strip of yellow quilling paper and make small snips in it.
-
Wrap the yellow piece around the orange piece a couple of times and secure with a dot of glue.
-
Once the glue has dried, fold down the yellow pieces to create small petals.
-
Glue the flower to the card base.
-
Add a stem piece with green paper like the Flower 1 above.
-
Using another green piece, create a scroll. Roll a piece of green quilling paper about half way. Remove the tool and roll in the reverse direction from the other end of the paper to create the scroll.
-
Glue the scroll to the card base, next to the stem.

